Requirements
Before you can link the application, you must add all required source programs and object files to your project and set the linker options (see below).
The files mainutm.c (to be used if no C++ programs are to be linked) and mainutm.cpp (if C++-programs are to be linked) are supplied with openUTM. These sources must be compiled and the resulting objects must be included in the application.
If the UTM utility program KDCMMOD has been used to generate a source for an application-specific message module then this must also be compiled and the resulting object linked into the application.
The ROOT table source that you must always create before linking with KDCDEF also belongs to the required source programs. It is recommended to store all source programs, including the ROOT table source, in the project directory.
Adding source programs and object files to the project
Open your project.
Add the source programs as follows into your project:
Click in the menu bar on Project and highlight Add Existing Item... This opens the Add Existing Item window.
Select the Visual C++ Files (.c;.cpp;.cxx;.tli;.h;.tlh;.rc) item as the File Type. Navigate in the project directory if necessary.
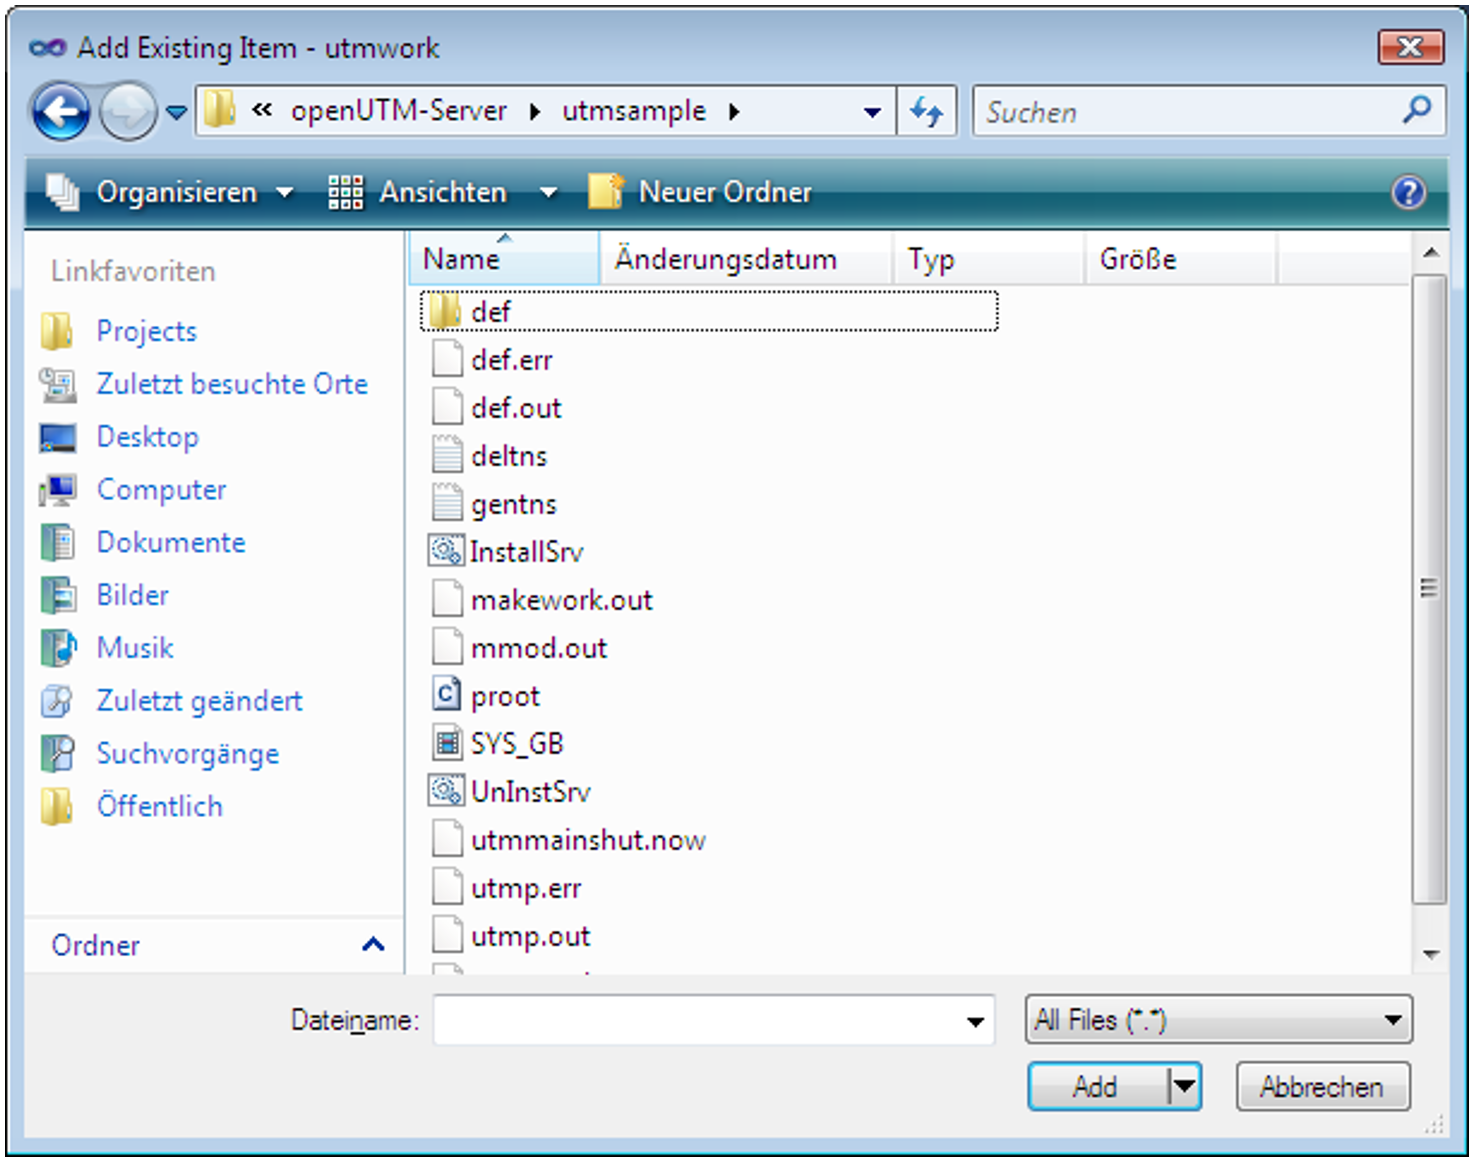
Highlight the following there:
The ROOT table source created with KDCDEF,
proot.cin the example.All source programs you have created that are to be linked in the project. Source programs that you have created in your project with the Visual Studio are automatically contained in the project and do not need to be highlighted.
Click on
Add. You have now added the source programs to the project.
You can also compile individual source programs beforehand for large projects (Build - Compile) and then add the object files as described below instead.
Add the UTM object files to your project in a similar manner:
Click in the menu bar on Project and highlight Add Existing Item... The Add Existing Item window is opened.
Add the UTM object files:
Select the All Files (*.*) item as the File Type.
Navigate in the directory utmpath\sysand highlight the following files:Either
mainutm.objor the object based onmainutm.cif no C++ programs are contained,alternatively
mainutmCC.objor the object based onmainutm.cppif C++ programs are contained.mainutm.obj/mainutm.cormainutmCC.obj/mainutm.cppcontain the main function of the application.
- If it is present, add the application-specific message module - however, this does not necessarily have to be located in utmpath
\sys. - Now click on Add. You have added the UTM object files.
Adding additional object files:
If you have already compiled programs, then repeat steps a) through c) from 3. for the corresponding object files.
Displaying files
You can view all the files contained in your project at any time by clicking Solution Explorer in the navigation area. In the work window, you can, for instance, also open and then edit source programs by double-clicking them.
Setting linker options
You must set the linker options each time before you link an application.
Choose Project - Properties from the menu to open the utmwork Property Pages window of the project (utmproject).
Choose Configuration Properties - Linker in the navigation area.
Under Linker, click General and under Output File enter the name
utmwork.exe.utmwork.exeis the name of the linked work process. This name cannot be freely selected.Under Linker, click Input and under Additional Dependencies, enter the UTM library
libwork.lib. This library must appear before all other libraries.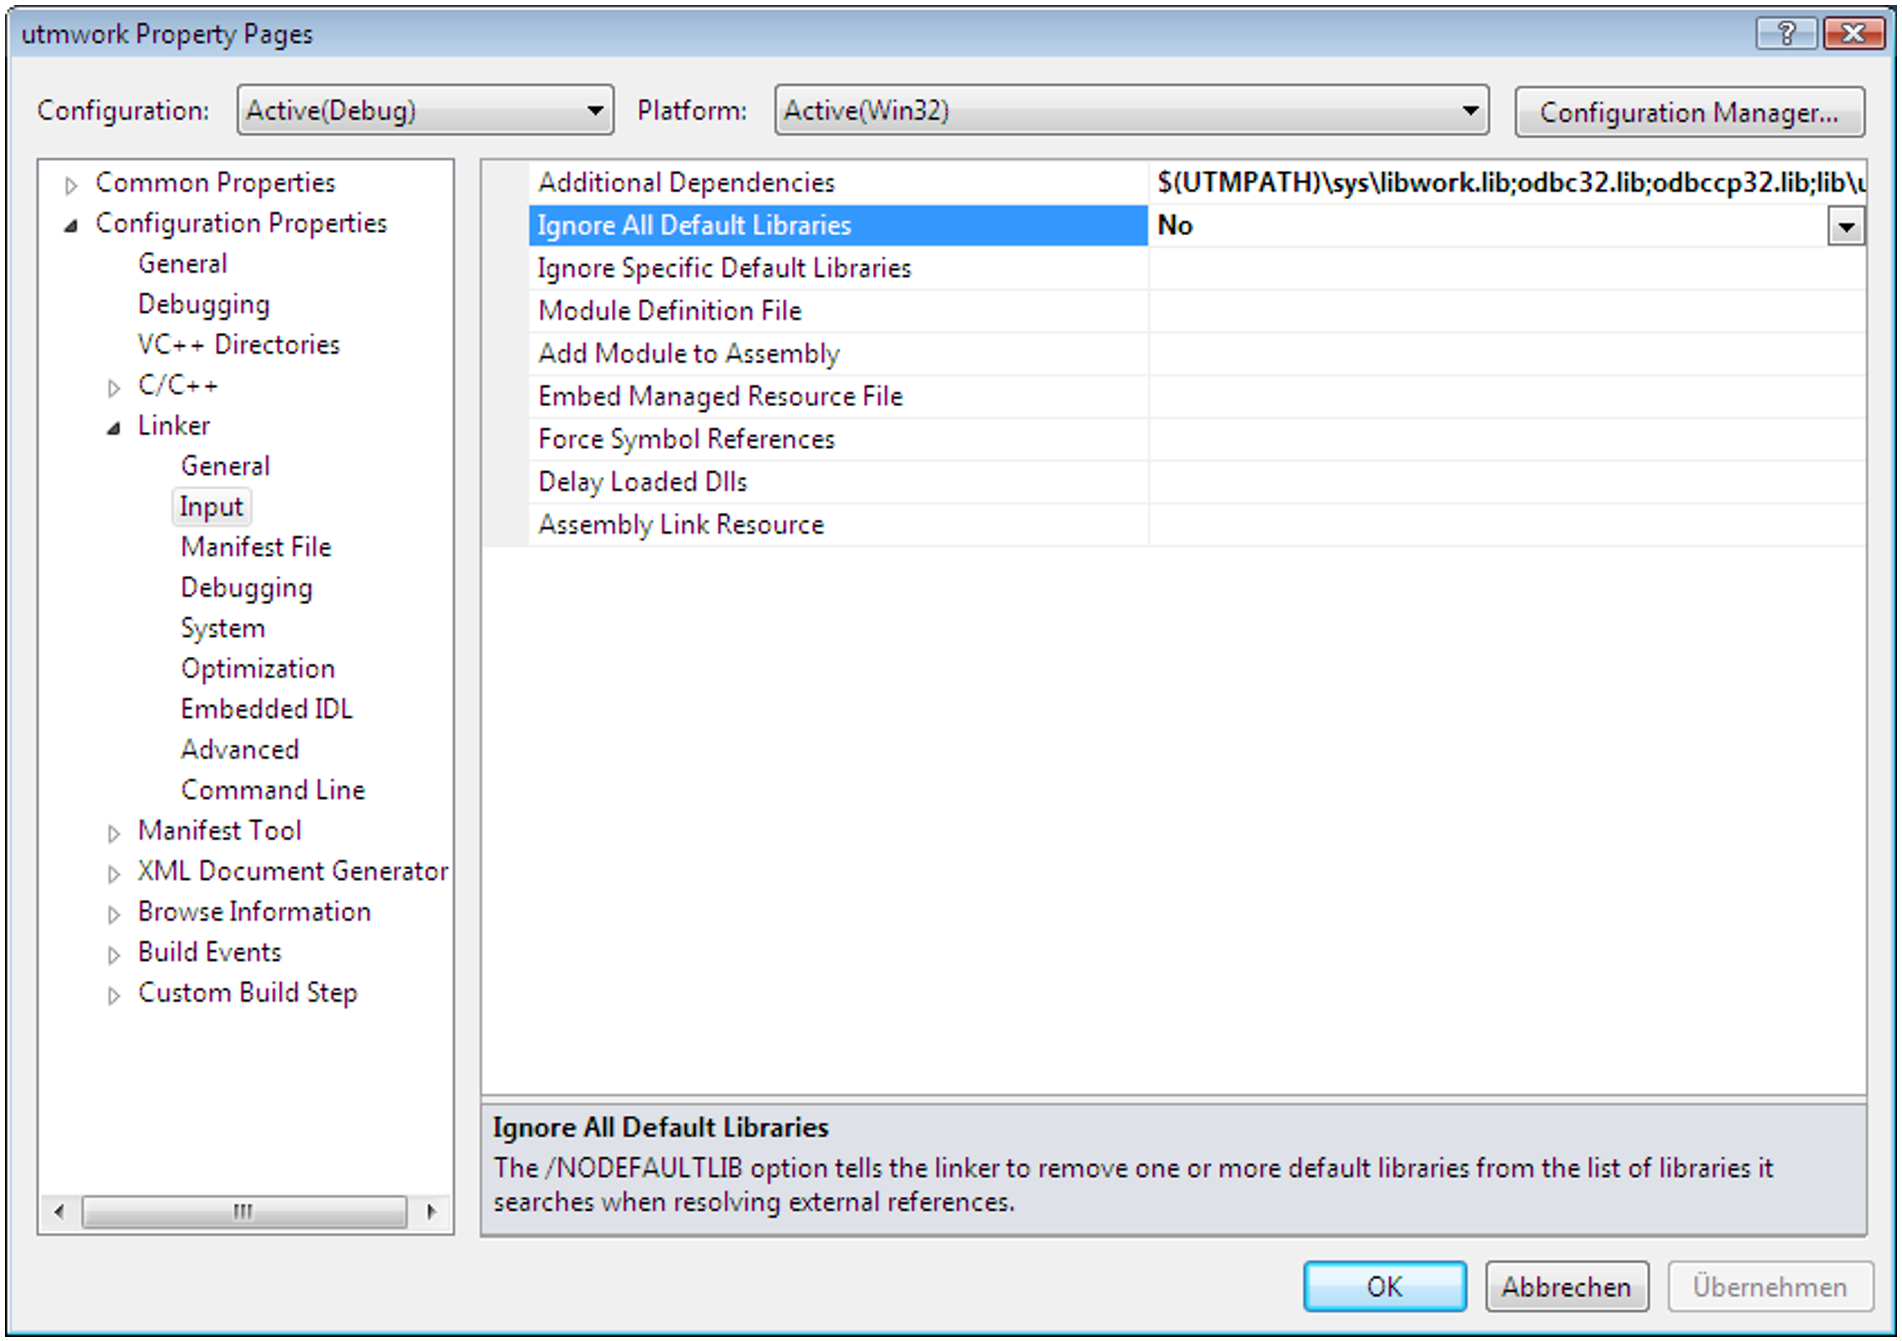
If you use the XATMI interface or databases, then you must also add the following libraries:
The
libxtclt.liblibrary for XATMI.The database library(ies). The library(ies) to be specified can be found in the documentation for the corresponding database.
Now click on OK. The linker options you selected are now valid.
Linking the application program
Open your project and select x64 for a 64-bit program as the target system.
Select the Build item in the menu bar and place the cursor on the Build utmwork item (see screen snapshot):
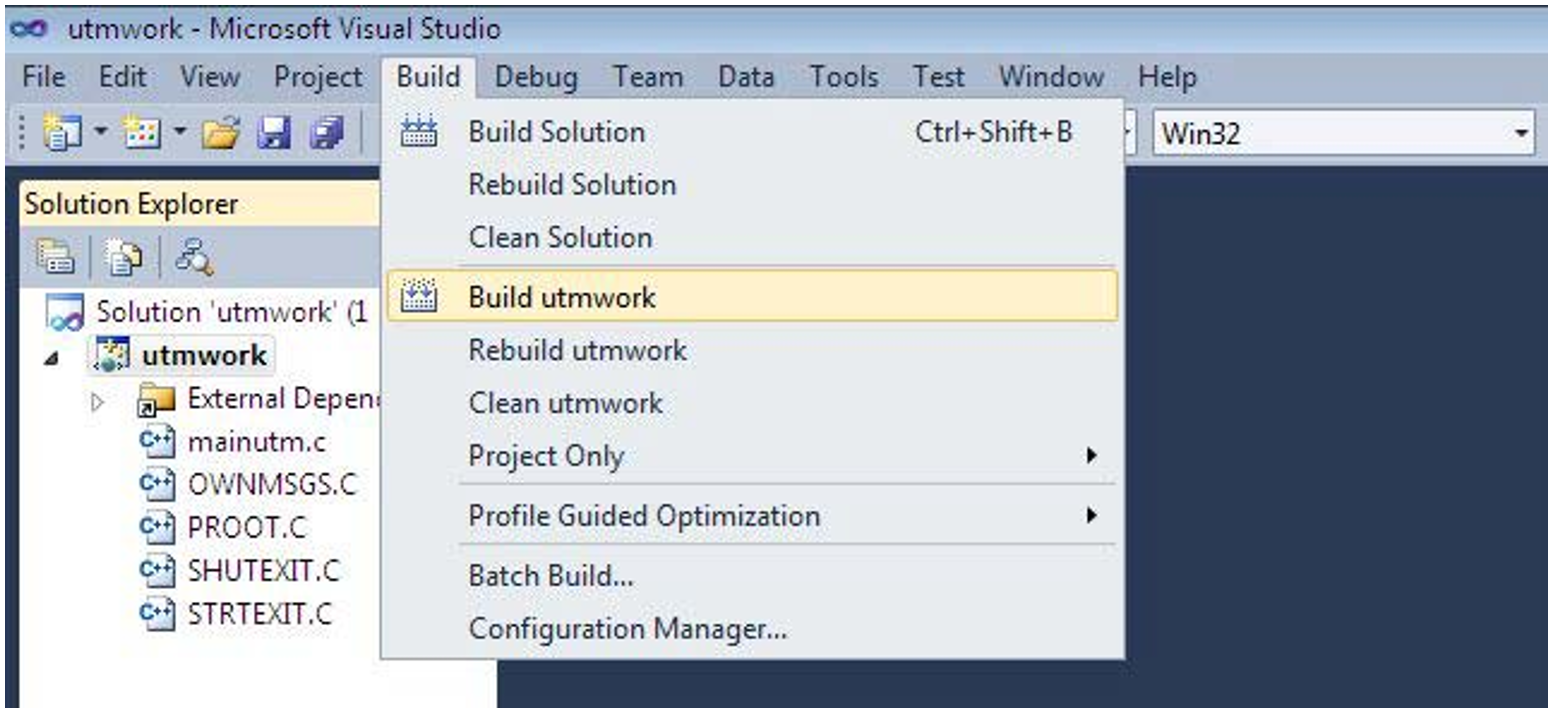
As soon as you click on the item, your programs are compiled and your application is linked.
Messages during linking
You receive the messages LNK4075 and LNK4056 when linking. You can ignore these messages; the LNK4056 messages arise because the application programs are source code compatible with Unix and Linux systems.
If you use the exit() function in a start exit, then you will also receive message LNK4006. This message is received because the exit() function is dealt with by UTM library libwork.lib and not by a Windows library as usually. This is the reason why libwork.lib must always be the first in the list (see above).
Result of the linker run
The application program utmwork.exe is stored in your project directory at the end of the linker run. As the openUTM main process always looks for the application program under this name, you may not rename utmwork.exe.