When implementing UPIC-local applications on Windows, you must bear in mind the special features described below.
Linking UPIC-local applications
When linking UPIC-local applications on Windows systems the following libraries are supplied:
utmpath
\upicl\sys\libupicl.lib, which must be linked to every client program and, if necessary,utmpath
\xatmi\sys\libxtclt.lib, which must also be linked to XATMI programs.
For further information on utmpath, refer to openUTM manual “Using UTM Applications on Unix, Linux and Windows Systems”.
Runtime environment
Executing the UPIC-local clients requires the dynamic libraries utmpath \ex\libupicl.dll and utmpath \ex\libxtclt.dll.
These DLLs can be found via the environment variable PATH. PATH is extended accordingly when openUTM is installed. The PATH environment variable must be manually extended as required following the installation openUTM.
Configuring a UPIC-local client with Visual C++ Developer Studio
The following briefly describes how you can configure a UPIC-local client project using the Visual Studio.
To configure the project, select the Settings... command from the Project menu of the Visual Studio. The Project Settings dialog box is displayed on the screen. Now proceed as follows:
Link in the UPIC-local libraries
libupicl.libandlibxtclt.lib:Select the Link tab sheet and make sure that in the Settings For list box the item All Configurations are marked.
In the Category list box set the category to General, enter the name you want for the output file (
upicl.exehere) and add the following libraries in the Object/Library Modules input field:libupicl.libfor configuring CPI-C clientslibxtclt.liband libupicl.libfor configuring XATMI clients (paying attention to the order:libxtclt.libmust come beforelibupicl.lib). A space must always be entered as the delimiter.
These libraries must be entered in front of all existing
*.libfiles. utm-dir stands for the installation directory of openUTM. If you enter search paths in Extras/Options in Developer Studio, you need not type in the full pathname here.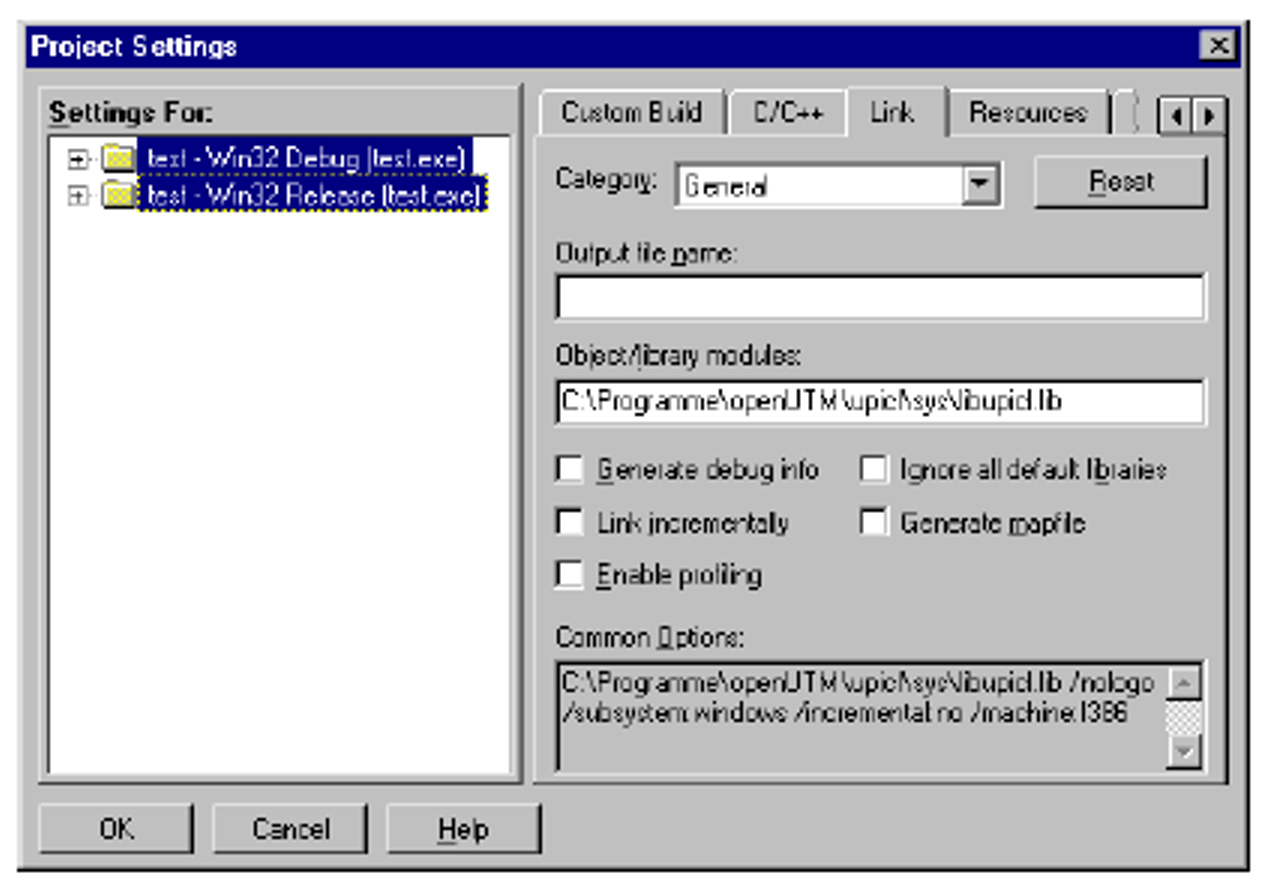
Configure debugger information:
Select the Link tab sheet and in the Settings For list box mark Win32Debug or x64 Debug in the Settings For list.
In the Category list box, set the category to Debug and in Debug Info and select the Debug Info and Both Formats options in Debug Info.
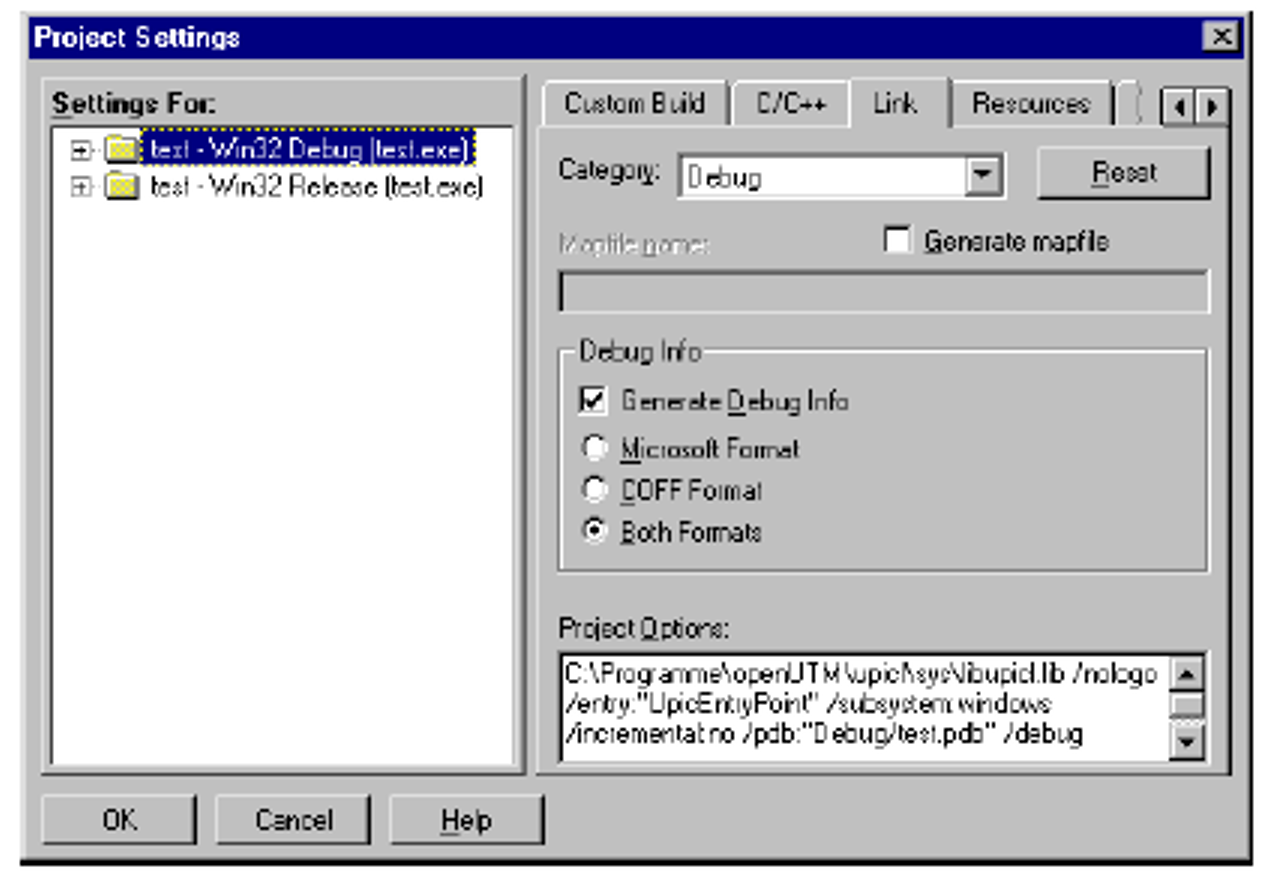
3. Confirm your settings in Project Settings by clicking on OK.