Before you can generate a proxy cluster, you must already have configured at least one proxy, see Configuring the BeanConnect proxy .
To generate a new proxy cluster, select the required proxy under BeanConnect Proxies and then choose the Define Proxy Cluster... command in the context menu. The proxy must not be started when you do this.
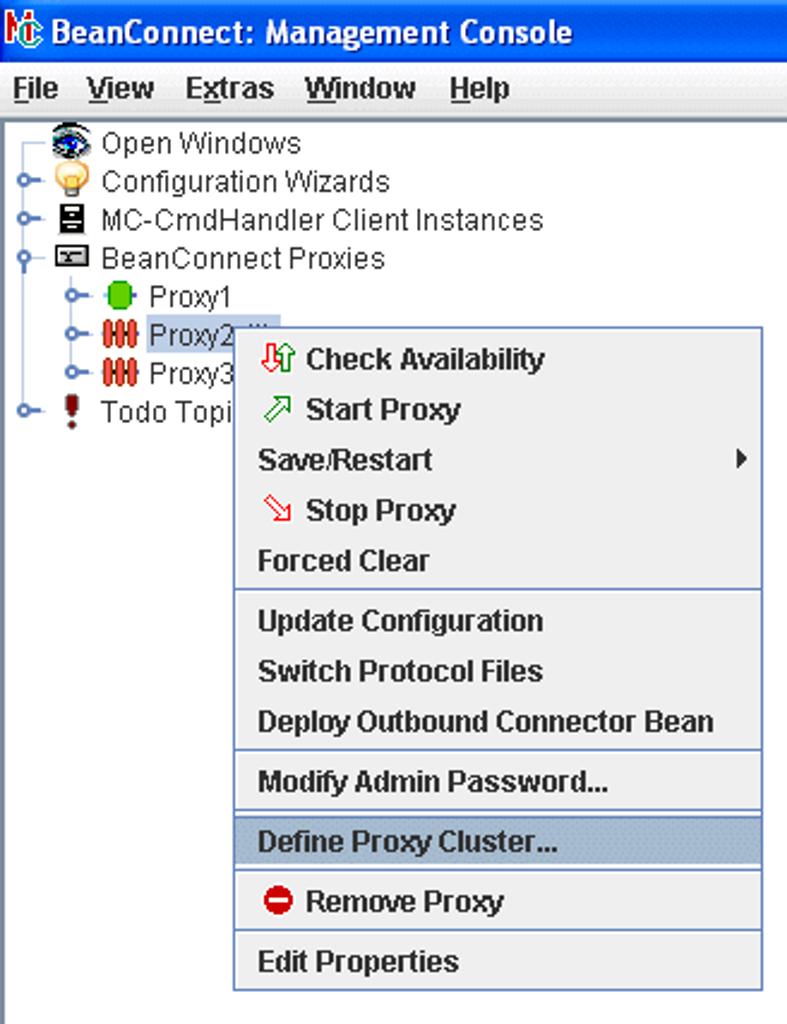
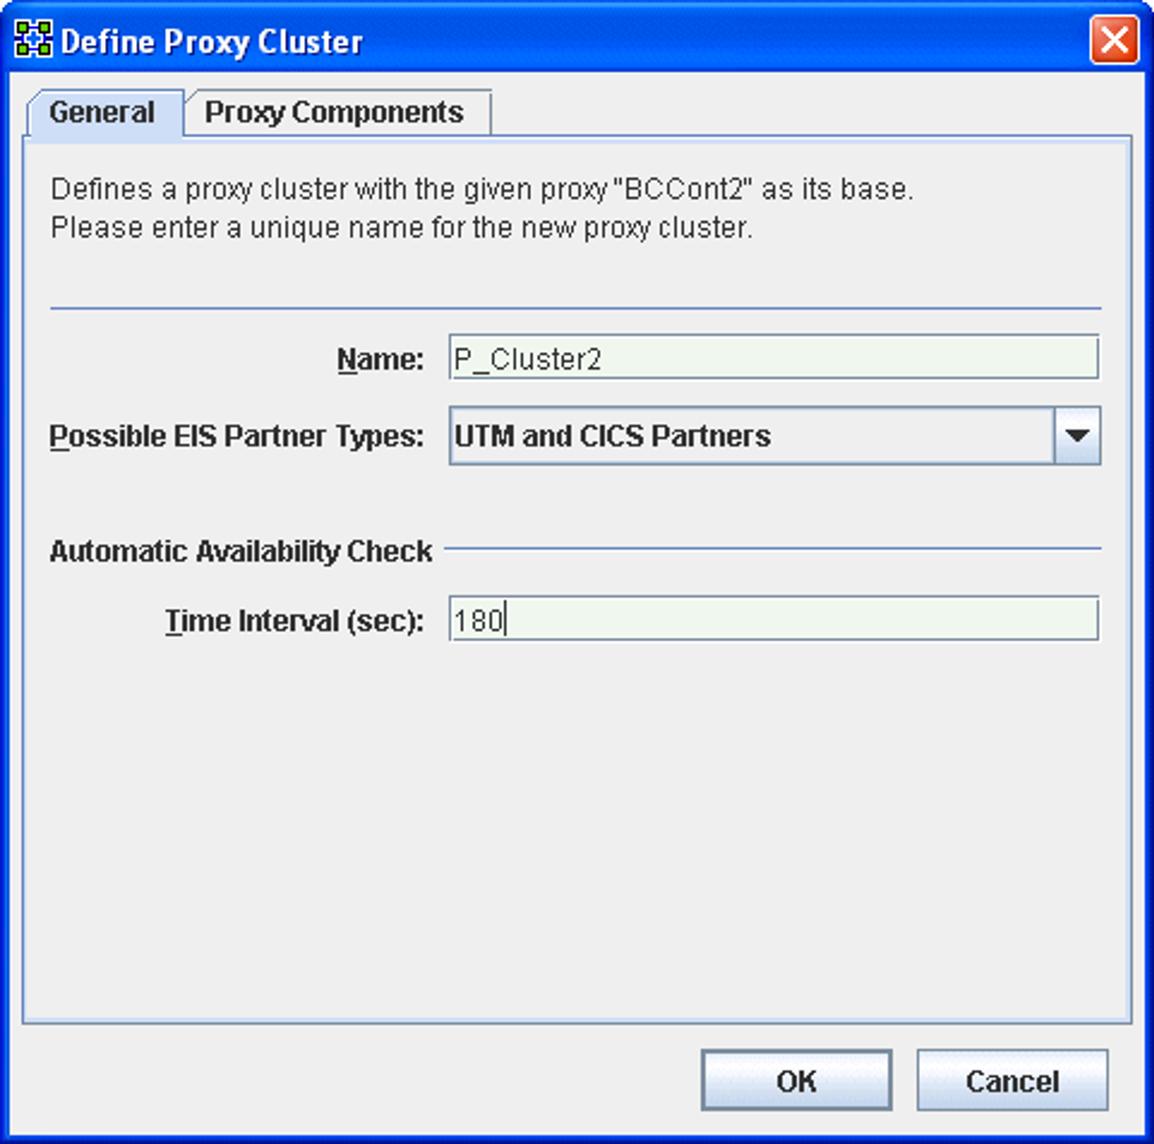
Figure 23:Generating a new proxy cluster
Enter the name of the new proxy cluster in the Name field in the Define Proxy Cluster dialog box. The values for the selected proxy are displayed in all the other fields. You can change these values if required.
When you exit the dialog with OK, a new node named BeanConnect Proxy Clusters is generated in the navigation tree. The cluster is entered here with the name defined above. At the same time, the proxy is removed from the list of BeanConnect Proxies. By default, the first proxy included in the proxy cluster becomes the master proxy.
Displaying the proxies in a cluster
To display the proxies in a proxy cluster, you can either click the proxy cluster node or choose the Show Cluster Proxies command in the context menu. A list of all the proxies is now displayed. The individual columns describe the properties of the proxies such as their names and address data. For further details, consult the online Help.