When they are created, XenVMs are already assigned a minimum basic configuration of XenVM devices:
One virtual disk
One virtual DVD device if the installation is a standard installation (the guest system is installed from an installation source on disk)
Optional: one virtual Network Interface Card
You can adjust the assignment of XenVM devices to current requirements.
Disks tab
You assign disk storage space to a XenVM by means of a virtual disk. You configure the virtual disk in a disk pool in which free storage space still exists. A disk pool makes available its storage space, which is provided on physical disks (see section "Managing XenVM devices on Server Unit x86"). You configure the first virtual disk of the XenVM when you create the XenVM, see section "VM administration".
> | Select Systems
|
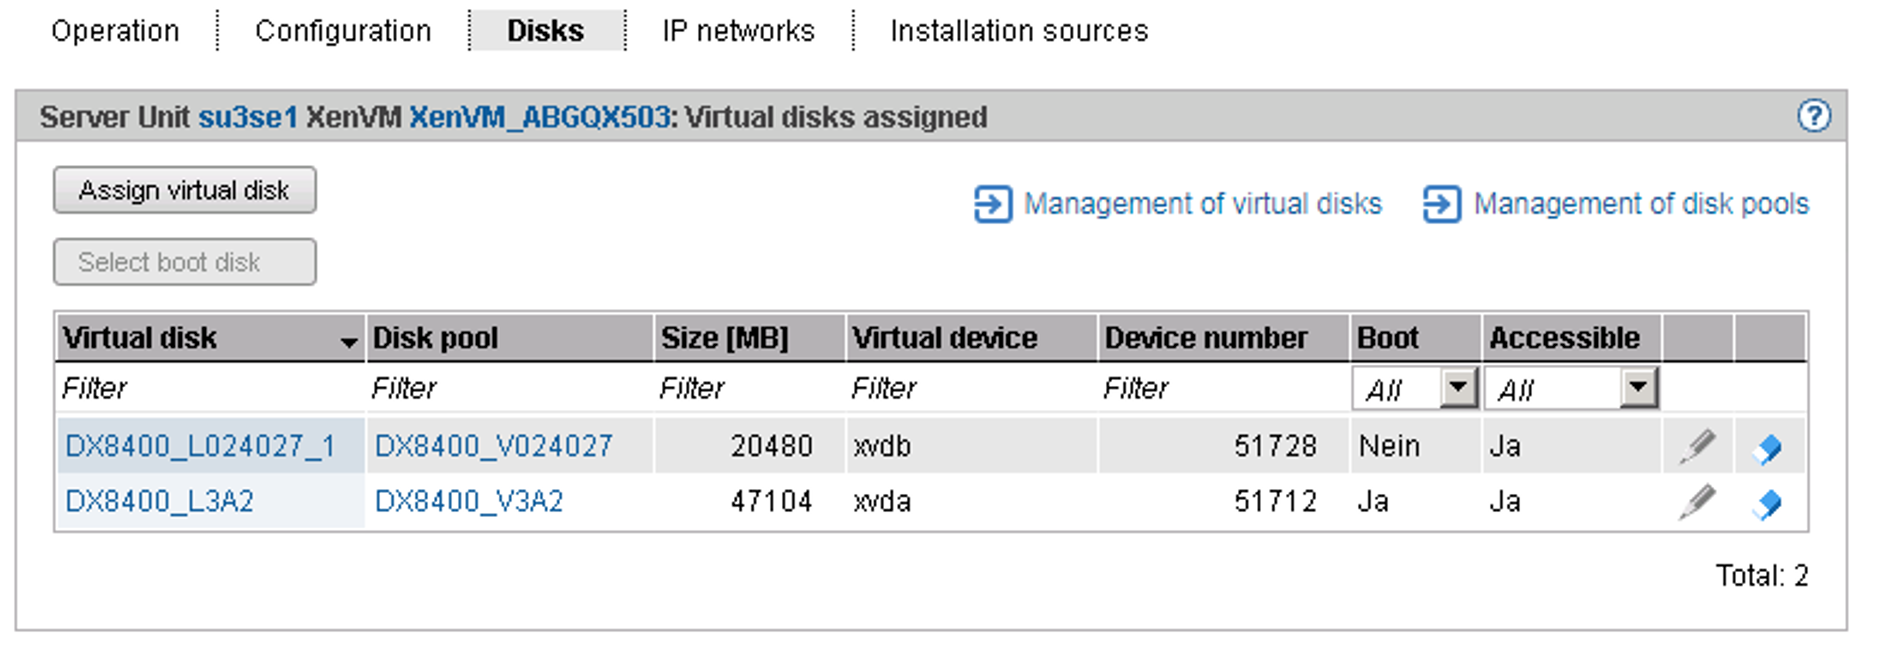
The Disks tab displays the virtual disks which are currently assigned to the XenVM. You can assign a virtual disk, select the boot disk, change the capacity of an assigned disk or remove a disk:
Assigning another virtual disk
> | Click Assign virtual disk (above the table). In the Assign virtual disk dialog box you specify the device name and determine whether the disk is to be created or whether an existing disk is to be used. |
The assigned newly created or reused disk is immediately available on the XenVM with the specified device name. A disk which already exists will, if necessary, also be used by other XenVMs.
Selecting the boot disk
By default the configured virtual disk becomes the boot disk when the XenVM is created. If changes to the configuration mean that no boot disk is defined any more or if further disks are available in addition to the boot disk, you can redefine the boot disk.
This action is only possible when the XenVM is in the STOPPED or STOPPED/INSTALLATION status.
> | Click Select boot disk (above the table). Select one of the virtual disks as the boot disk in the Select boot disk dialog box. |
The selected disk immediately becomes the boot disk. The next time the XenVM is started, an attempt is made to load the operating system from this disk.
Increasing the capacity of a virtual disk
You can increase the size of a virtual disk as long as the associated disk pool has sufficient storage space.
This action is only possible when the XenVM is in the STOPPED or STOPPED/INSTALLATION status.
> | Click the Change icon by the disk to be extended and specify the size of the additional storage space (in MB). |
If the specified value does not exceed the maximum value, the virtual disk is increased in size by this value. The entry being rounded up to a value which is divisible by 4. Too low a maximum value indicates that the disk pool does not have enough free storage space. In this case first expand the disk pool.
Removing virtual disks
You can remove a virtual disk from the configuration of the XenVM. The disk remains available as a free virtual disk and can be used again on a different XenVM.
This action is independent of the status of the XenVM, i.e. also possible in the RUNNING status.
> | Click the Remove icon by the disk to be removed and confirm the action. |
The virtual disk is immediately removed from the configuration of the XenVM. The disk is displayed with the XenVM devices as a free virtual disk.
When you have removed the boot disk, you must define another disk as the boot disk before you next start the XenVM.
IP networks tab
When you create the XenVM, you can optionally configure a virtual Network Interface Card to permit network access for the XenVM (see section "VM administration"). The virtual Network Interface Card (NIC) establishes the XenVM’s network connection via a virtual switch. You make virtual switches available as XenVM devices (see section "Managing XenVM devices on Server Unit x86").
> | Select Systems
|
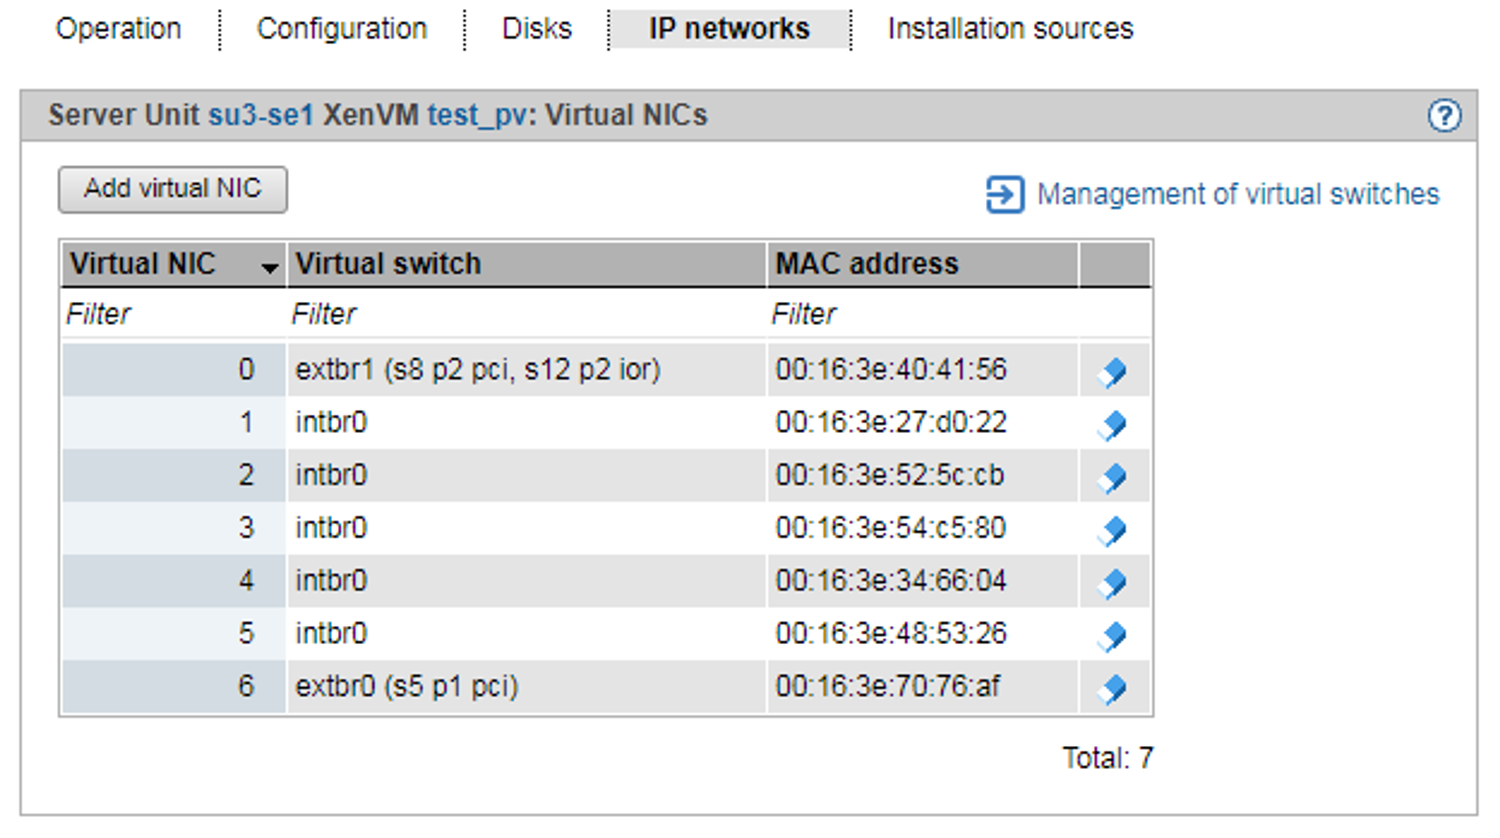
The IP networks tab displays the configured virtual NICs of the XenVM. You can add or remove a virtual NIC:
Adding a virtual NIC
> | Click Add virtual NIC and enter the required settings in the Add virtual NIC dialog box. The virtual Network Interface Card is configured immediately. |
Removing a virtual NIC
You can remove a virtual Network Interface Card which is no longer required from the configuration. In a fully virtualized guest system removal during ongoing operation may be rejected in accordance with the installed VMDP drivers and a message to this effect issued.
> | Click the Delete icon by the virtual Network Interface Card to be deleted and confirm the action. |
The virtual Network Interface Card is removed from the configuration. The MAC address which was used is once more freely available.
Installation sources tab
When the XenVM is created, you specify an installation source from which the XenVM‘s operating system is to be installed (see section "VM administration"). Possible installation sources are available in the local library on the Server Unit (see section "Managing XenVM devices on Server Unit x86"). You must assign an installation source which is to be used for installing the XenVM to the XenVM as a virtual DVD device.
> | Select Systems
|
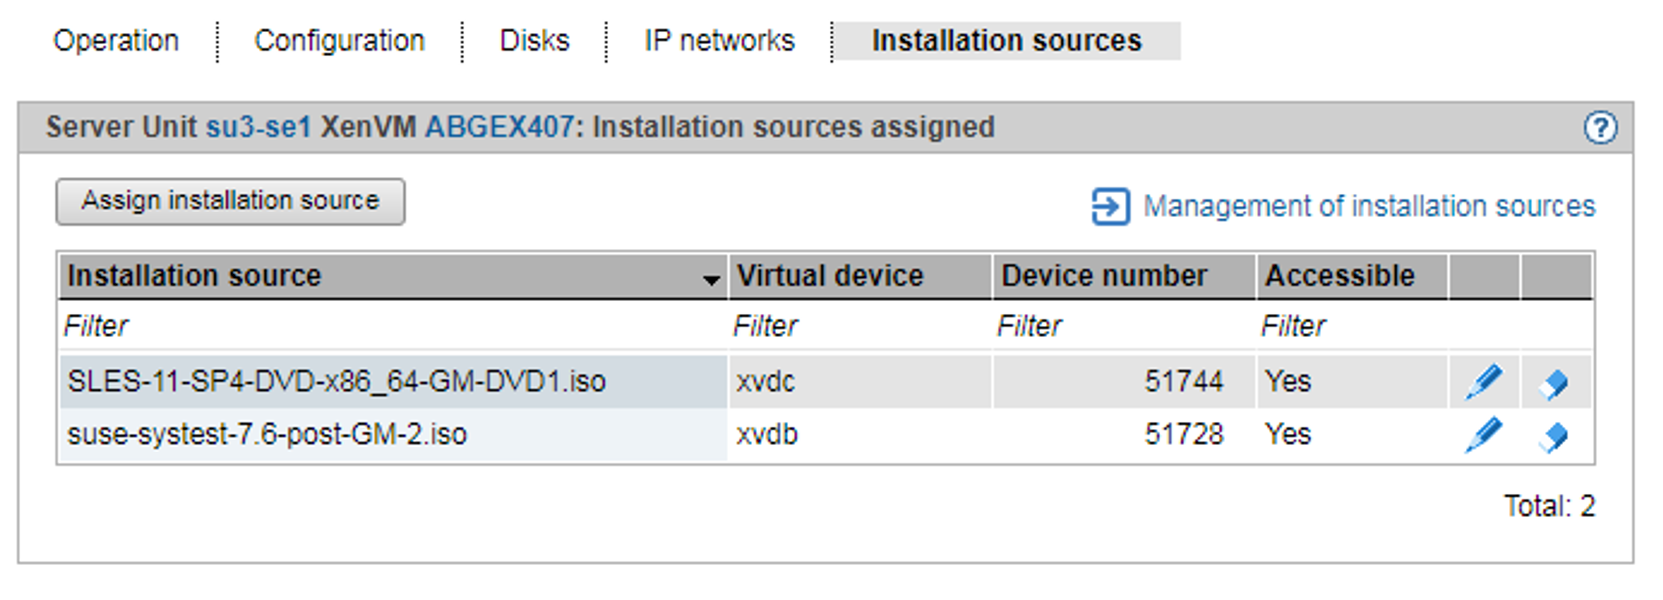
The Installation sources tab displays the installation sources of the XenVM. During an installation process, the installation configuration file is also displayed if required. You can add, replace or remove an installation source retroactively:
Assigning an installation source
The XenVM always boots from the installation source with the lowest virtual device number (e.g. from hda or xvda). How the other installation sources are handled is decided by the guest system.
> | Click Assign installation source (above the table) and enter the required settings in the Assign installation source dialog box. |
The new installation source is immediately added to the installation sources of the XenVM.
Switching the installation source
The installation source can also be changed during ongoing operation. You can only assign no installation source if you are using a fully virtualized guest system (Windows or Other operating system).
The virtual drive is retained (possible also as an empty drive). Access from the active guest system is immediately possible (e.g. for calling the setup to install an application).
> | Click the Switch icon by the installation source you wish to swap and select another installation source from the list. |
The new installation source is immediately added to the installation sources of the XenVM.
Removing an installation source
You can remove the assignment to the XenVM for an installation source which is no longer to be used. This action is independent of the status of the XenVM, i.e. also possible in the RUNNING status.
> | Click the Remove icon by the installation source you wish to remove and confirm the action. |
The assignment of the installation source to the virtual device of the XenVM is immediately canceled. The virtual device can be used for new assignments. The installation source remains available in the local library.