An SU /390's BS2000 system is integrated into a LAN via ZASLAN and LOCLAN, the MU permitting a connection via LOCLAN and the HNC via ZASLAN and LOCLAN. On an SU x86, the BS2000 is integrated into a LAN via ZASLAN, LOCLAN and BRGLAN.
From the BS2000 viewpoint, a LAN device is always a device pair.
For VM2000 mode it is necessary to define at least one LAN device per VM.
> | In the tree structure select Devices 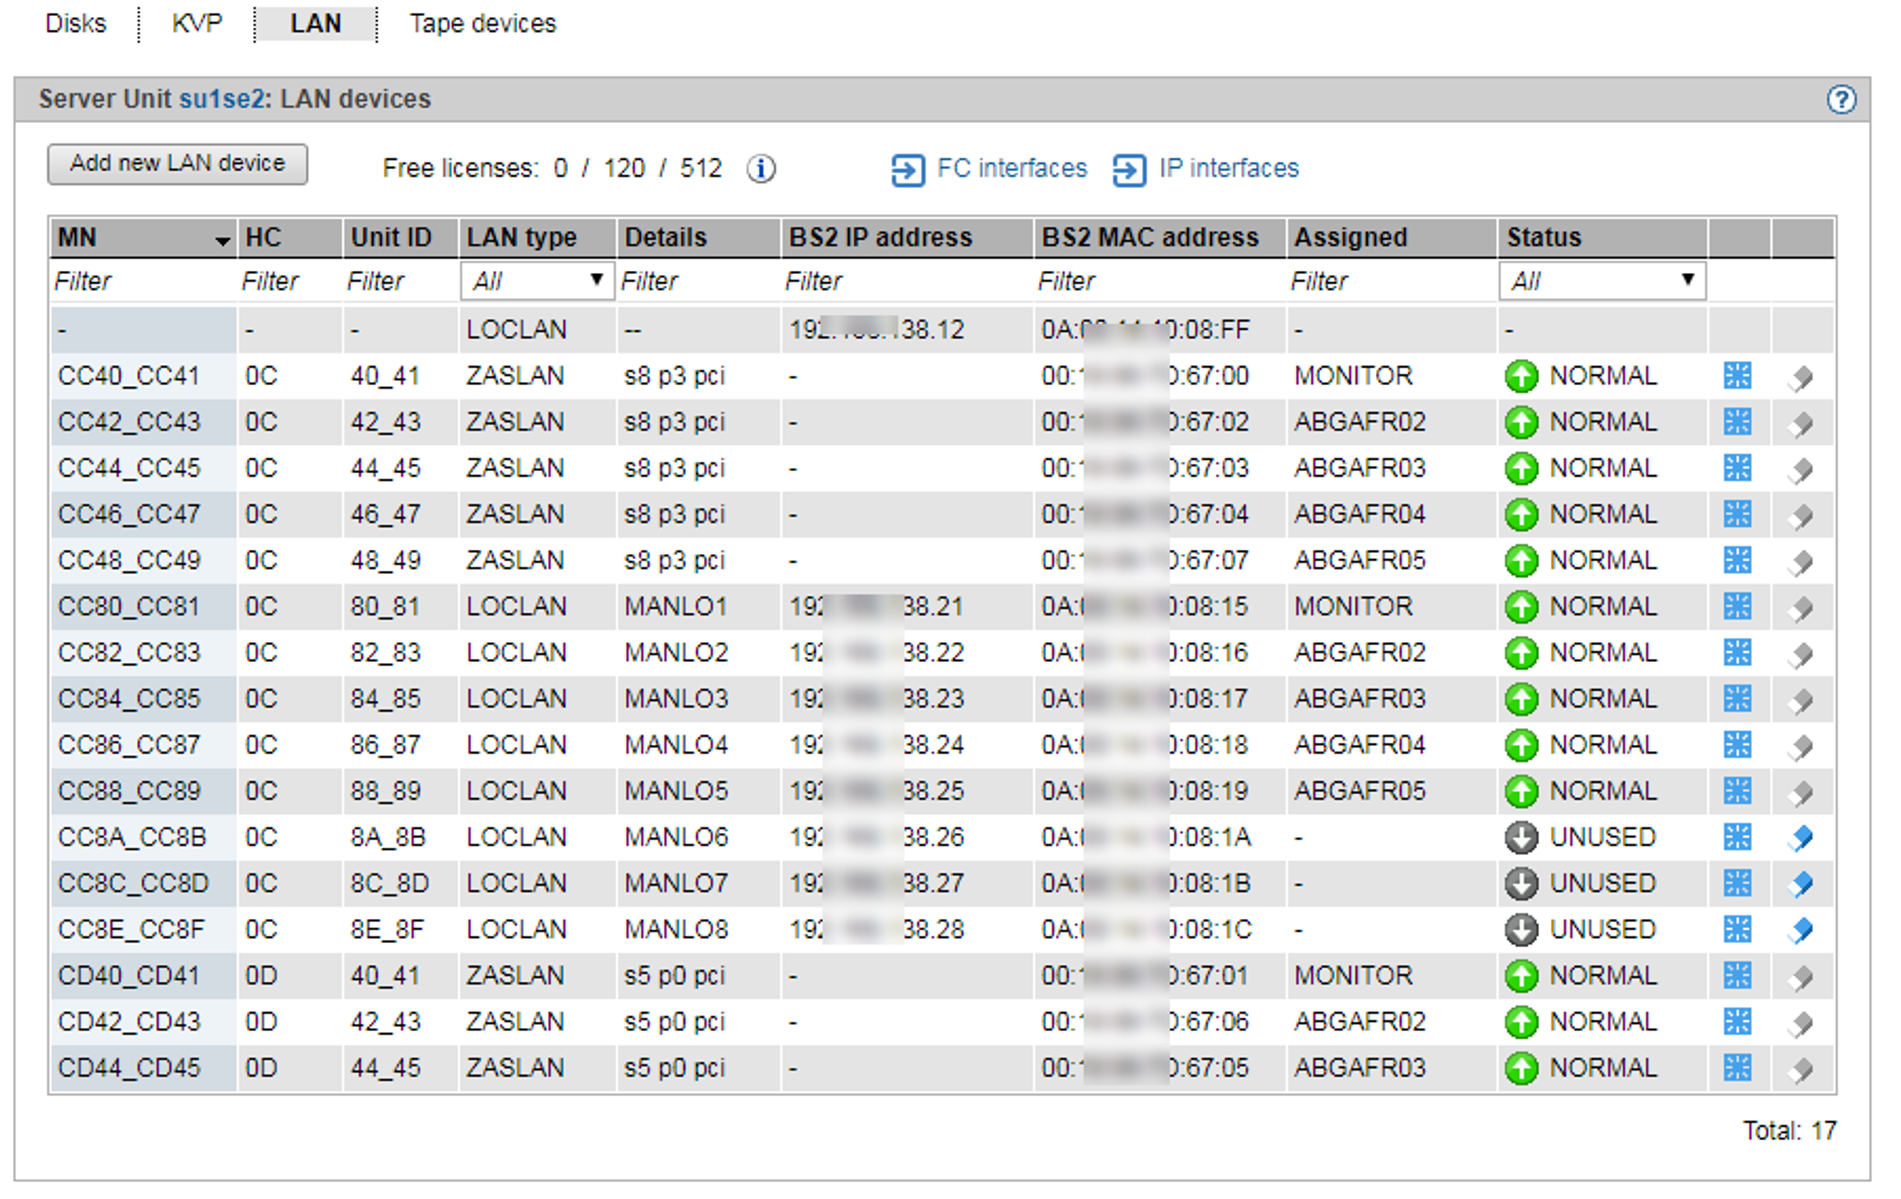 |
The LAN tab lists the configured LAN devices.
Above the table, the free licenses for LOCLAN, ZASLAN and, for SU x86, for BRGLAN are shown. When you drag the mouse cursor over the information symbol, a tool tip displays detailed license information.
Information on the generated LAN devices on SU /390
The devices are displayed only if the active IORSF file has the status "File transferred".
Entries of the type IORSF display devices which are generated exclusively in the IORSF.
Entries of the type LOCLAN and ZASLAN display the LAN devices already defined. If the device is also generated in the IORSF, a valid channel path identifier is displayed under CHPID. Otherwise only a warning icon is displayed under CHPID, and the device must still be generated (in BS2000 with /ADD-IO-UNIT).
In VM2000 mode the table contains an additional column: if a device assignment exists, the Assigned column displays the VM.
The LAN tab offers the following functionality for managing the LAN devices:
Add new LAN device
> | Click Add new LAN device. |
In the Add LAN device wizard you can specify the required properties of the LAN device step by step.
Restart LAN device
The restart allows you to rectify a problematical situation which affects the device.
> | By the required device click the Restart icon and confirm the action. |
Removing a LAN device
> | Click the Remove icon by the required LAN device and confirm the action. |