A KVP (console distribution program) with the name HV0 is preconfigured on the MU and SU x86 (see table 4 and table 6). You can delete the existing KVP and then define a new one with different values.
BS2000 sees a KVP as two (emulated) KVP devices (or a device pair) which are identified by their mnemonic names.
For VM2000 mode it is necessary to define at least one KVP per VM. By default HV0 is the monitor system's KVP.
Access to a BS2000 console always takes place via the KVP and the home account. An operator requires an individual right for access. For information on this, see section "Opening the BS2000 console and dialog window".
Recommendation:
Define precisely one KVP for each VM (in the case of SU /390 for each MU).
> | Select Devices 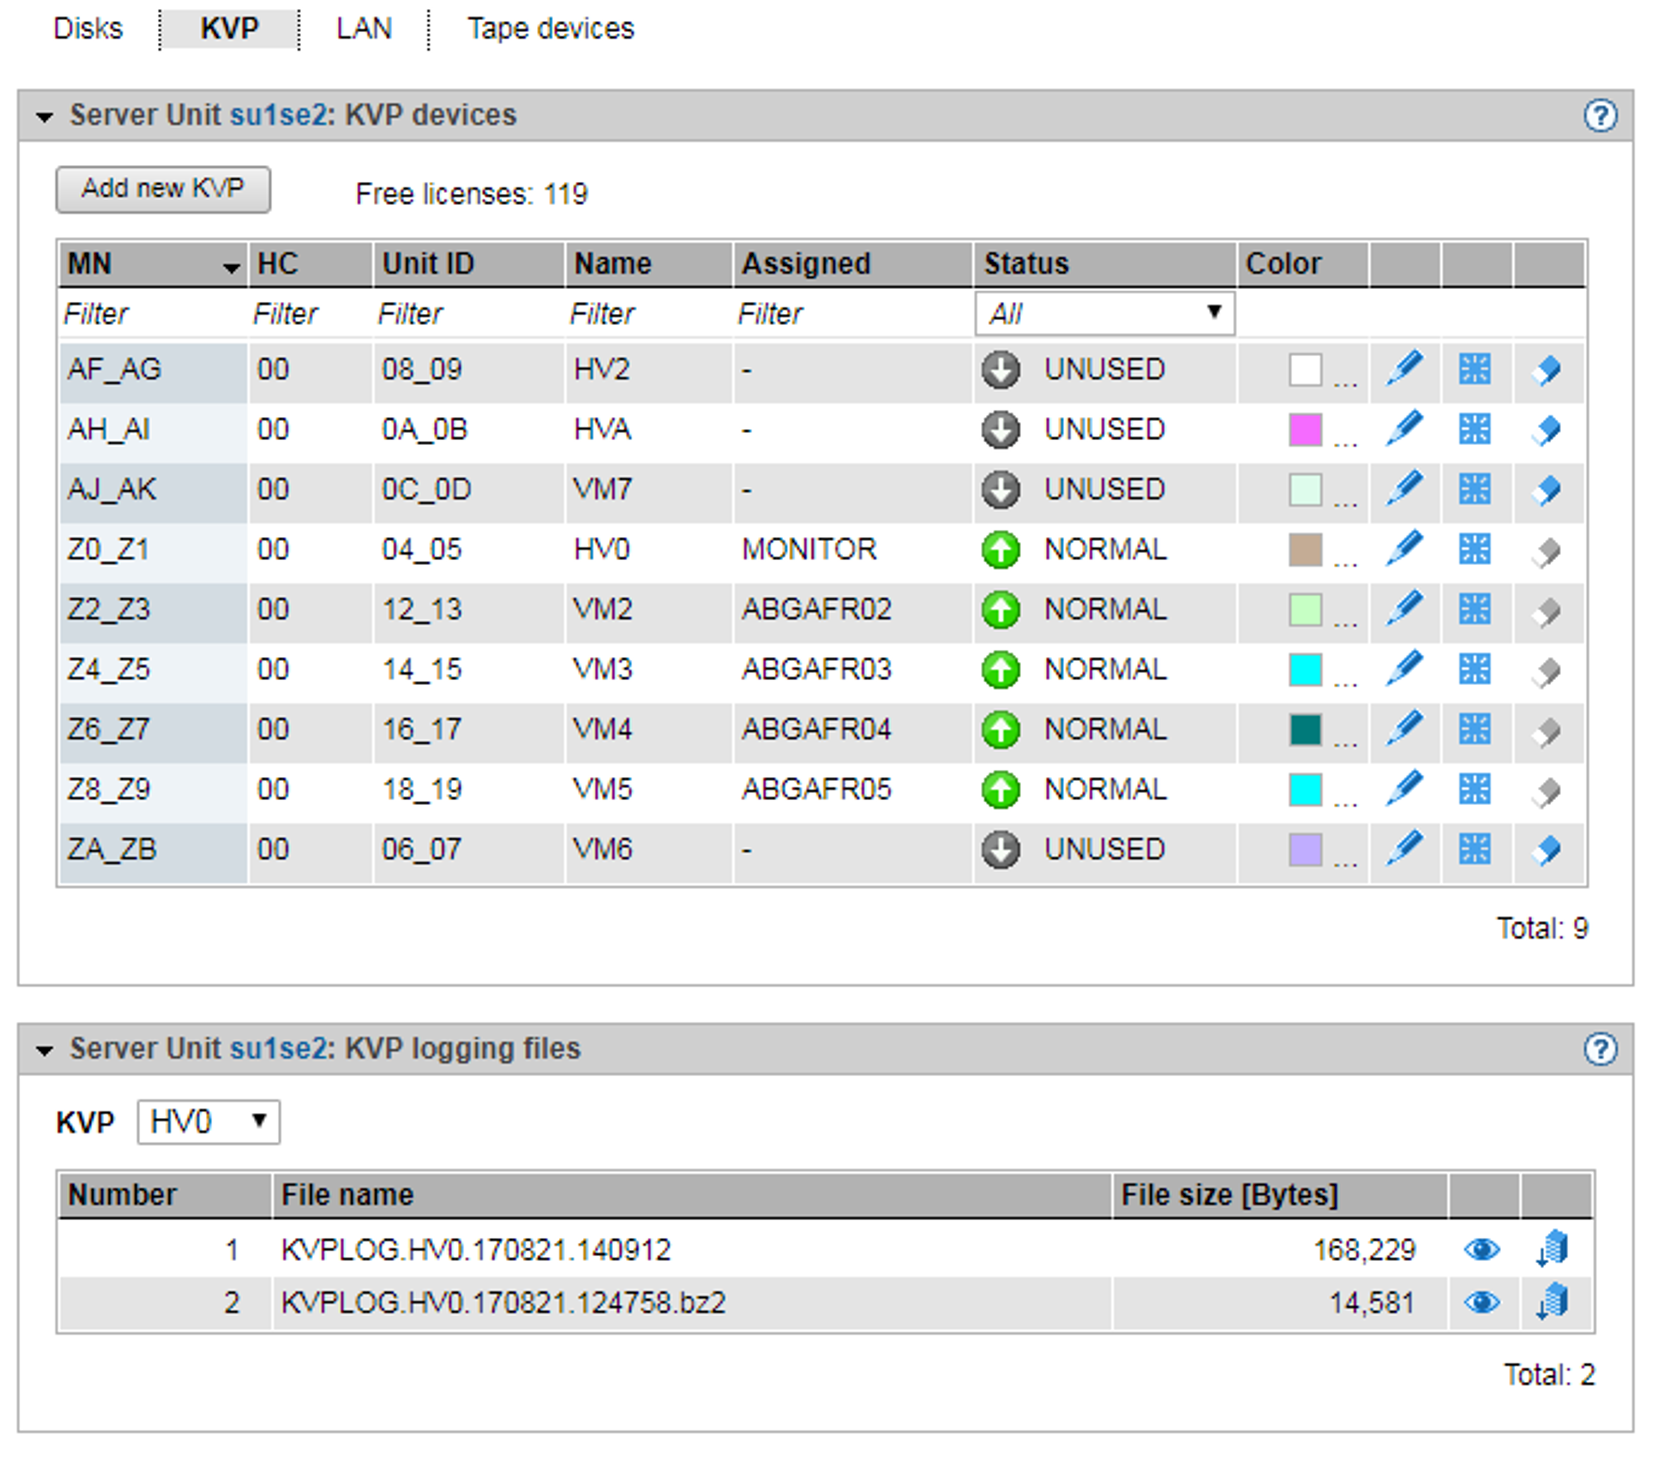 |
The KVP tab with the KVP devices and KVP logging groups opens. When expanded, the groups display a table containing the current KVPs and the logging files of the selected KVPs (see section "Managing KVP devices").
Above the table the number of free licenses is displayed. Only for SU /390: When you drag the mouse cursor over the information symbol, a tool tip displays the number of licenses per MU.
Information on the generated KVP devices on SU /390
The devices are displayed only if the active IORSF file has the status "File transferred".
Entries of the type IORSF display devices which are generated exclusively in the IORSF.
Entries of the type KVP display the KVP devices already defined. If the KVP is also generated in the IORSF, a valid channel path identifier is displayed under CHPID. Otherwise only a warning icon is displayed under CHPID, and the device must still be generated (in BS2000 with /ADD-IO-UNIT).
In VM2000 mode the table contains an additional column: if a device assignment exists, the Assigned column displays the VM.
The KVP tab offers the following functionality for managing KVPs:
Adding a new KVP
The KVP is created by this action.
> | In the KVP devices group, click Add new KVP. In the Add KVP wizard you can specify the required properties of the KVP step by step. |
Changing the color of a KVP
With this action you define the color for the console window's frame. This enables a number of opened console windows to be distinguished just by their frame color.
> | In the KVP devices group, click on the Change icon by the required KVP and determine a new color code. |
Restarting a KVP device
The restart allows you to rectify a problematical situation which affects the device. Open KVP connections (console windows) are then terminated.
> | Click the Restart icon by the required KVP. |
Removing a KVP
When the KVP is removed, the associated KVP logging files are also deleted. The history of the BS2000 systems is then no longer complete.
> | In the KVP devices group, click the Remove icon by the required KVP. |
Displaying KVP logging file selectively
As access is possible to all KVPs, files of a KVP whose assignment to a BS2000 guest system has already been deleted can still be displayed. This also permits the BS2000 history of BS2000 guest systems which have already been deleted to be traced if necessary.
Only the KVP assignment is displayed, not the VM assignment, because a different VM assignment may have been valid in a previous session.
You can also view the log files of a KVP which is not assigned to any BS2000 system (e.g. because the latter has already been deleted). This enables you to access all logs of all KVPs of this Unit
> | In the KVP logging files group select the required KVP from the KVP list. The KVP logging files which exist for this KVP are listed. The Display icon opens the Display KVP logging file selectively dialog box in which you can define the view of the content of the KVPLOG file to be displayed. The logging records are displayed in a separate window. |
Downloading the KVP logging file
> | In the KVP logging files group select the required KVP from the KVP list. Click the Download icon by the required KVP logging file. Enter the path and file names in the system-specific Explorer window and save the file. |