Remote Service
Customer Support activities on the SE server are monitored with the help of the shadow terminal. Configuration can be implemented in such a manner that you as administrator, for instance, observe all the Customer Support activities (mandatory use of a so-called shadow terminal).
Remote service ensures that a teleservice call is sent to the Support Center when a problem occurs (outgoing connection).
Customer Support can establish the connection to the SE server itself (incoming connection) if it wants to correct the problem or take preventive measures (changes, updates, diagnostics, etc.).
If it is absolutely essential, as an administrator (and to a lesser extent as an operator) you can change the remote service configuration or intervene in a service operation which is currently running.
Important!
Please discuss every change to the remote service configuration with the Support Center, otherwise you will put the serviceability of your SE server at risk. Aspects of remote service which are relevant to security are described in the Security Manual.
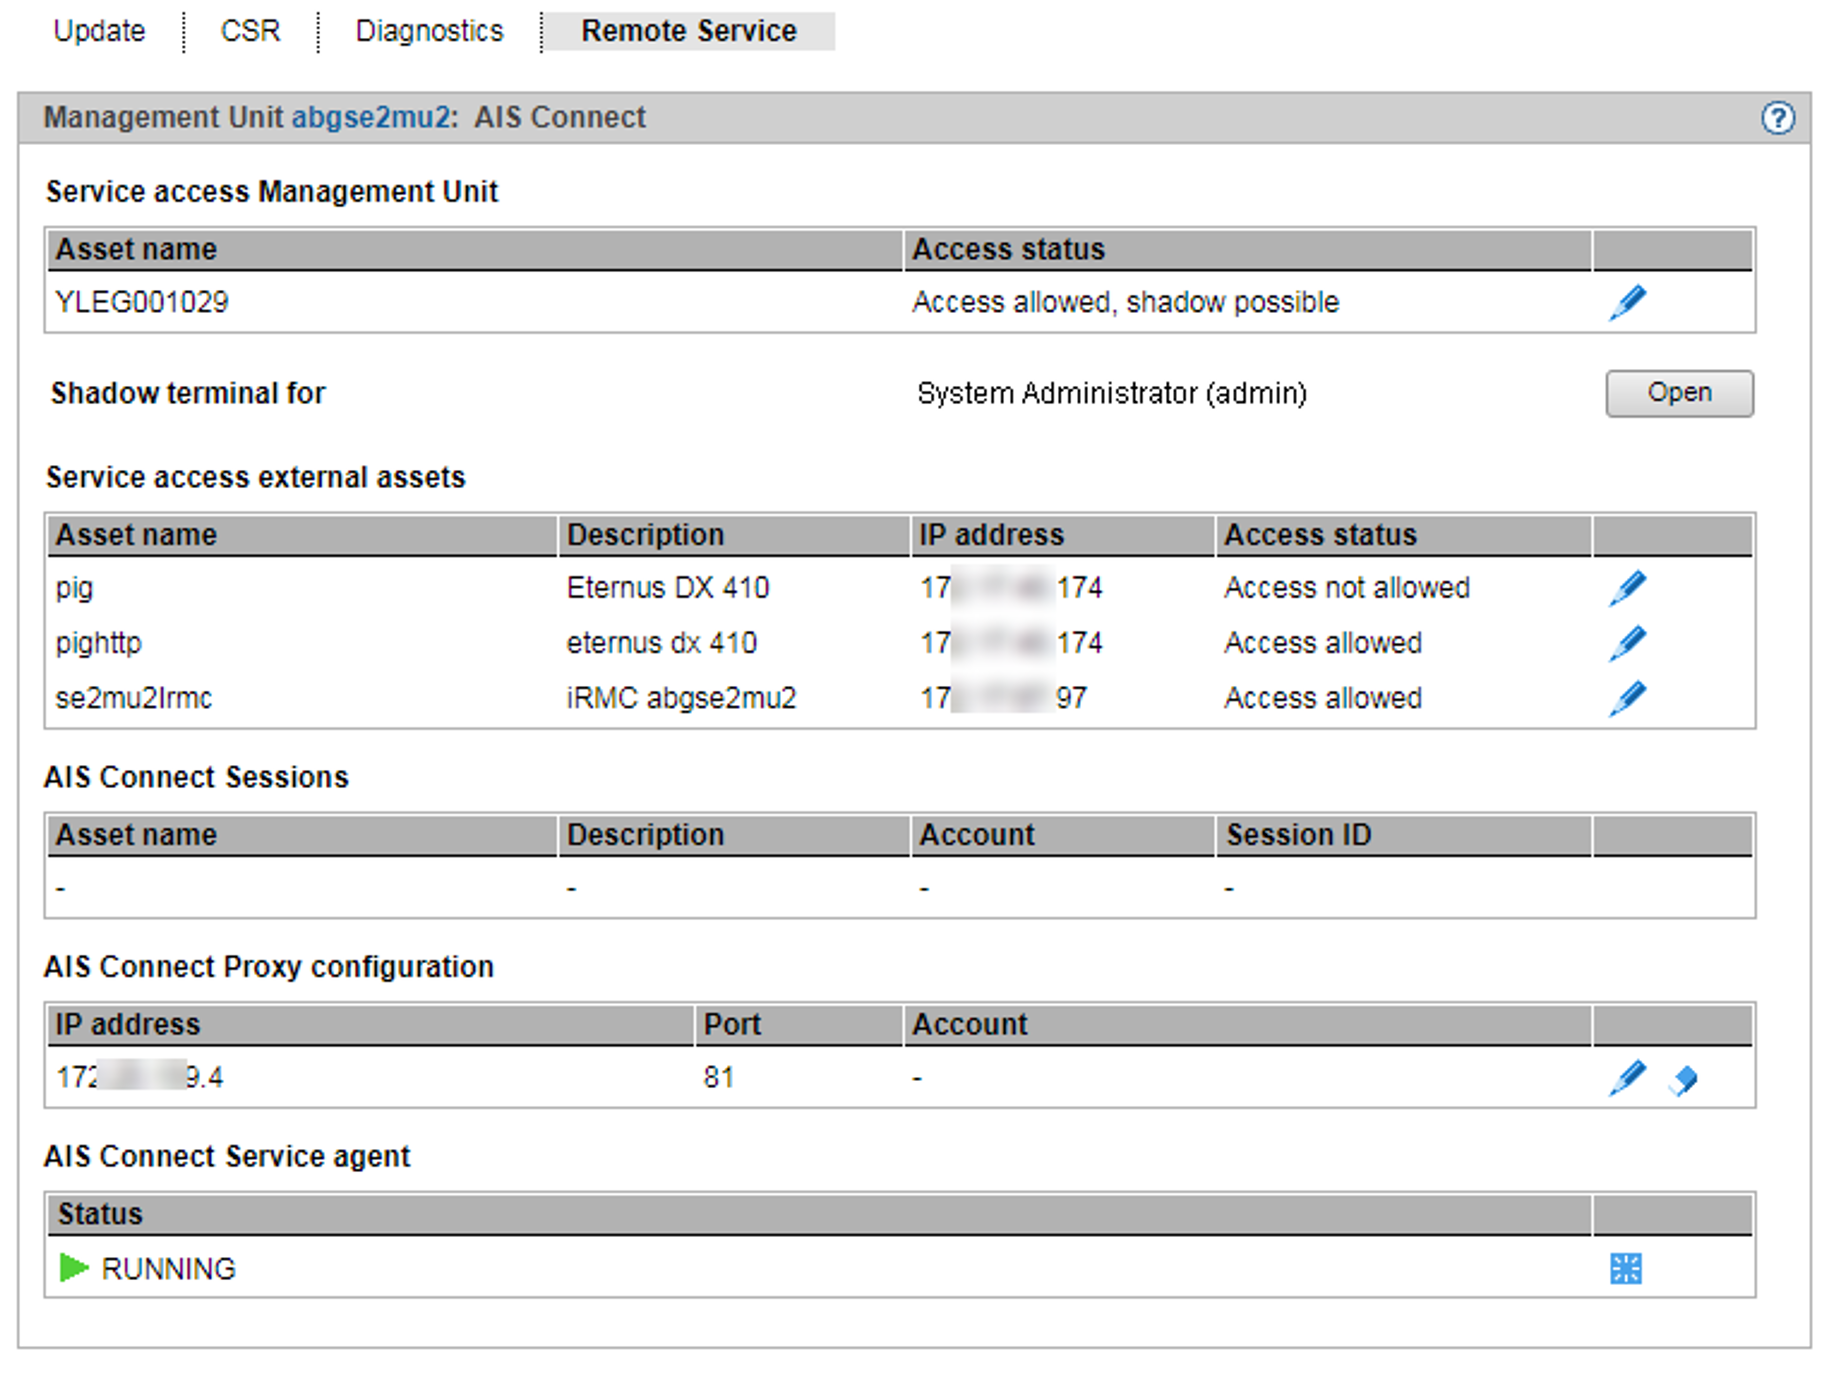
External assets
AIS Connect enables Customer Support connections to be configured via the Management Unit to selected storage systems which in this context are referred to as external assets. These connections are configured by Customer Support in agreement with the customer. As administrator you can at all times modify the Customer Support access to specific external assets (allow or not allow).
External assets are only possible when the MU is connected directly, but not via a gateway.
Service accounts
To perform its work, Customer Support logs in (remotely via Teleservice or locally) under the service account provided for this purpose. On the units the protected account service is available to Customer Support in the operating system.
Remote Service tab
Service access is managed via the Management Unit. The Remote Service tab is provided in the Service menu for this purpose:
> | Select Hardware The Remote Service tab displays the groups Service access Management Unit, Service access external assets (if at least one service access to an external assets is configured), AIS Connect Sessions, AIS Connect Proxy configuration and AIS Connect Service agent.
|
Changing the service access
> | In the Service access Management Unit or Service access external assets group, click on the Change icon next to the required asset. In the subsequent dialog box select one of the available access settings and confirm the action. |
Opening a shadow terminal
The functionality is restricted for users without administrator rights:
For AU- and XenVM-administrators, the whole main window is not displayed.
BS2000 administrators can control the shadow terminal.
An operator can only control the shadow terminal if he/she has an individual authorization.
> | Click the Open button after Shadow terminal for <account> in order to open a terminal window. The account tele is switched to automatically and a shadow is opened. You can follow the activities of Customer Support in this window. Depending on the current setting of the Customer Support access (see Access status), you have the following options:
|
Displaying the current usage of the service access / deleting a session
The AIS Connect Sessions group displays the sessions that currently use the service accesses to the Management Unit and to the external assets.
External assets are only possible when the MU is connected directly, but not via a gateway.
> | To delete an AIS Connect session (i.e. abort), click the Delete icon next to the required AIS Connect session in the AIS Connect Sessions group and confirm this action. Deletion takes place asynchronously. |
Entering/changing or deleting a proxy configuration
> | To enter or change a proxy configuration, in the AIS Connect Proxy configuration group click the Change icon by the required proxy server for AIS. Define the properties of the proxy configuration and confirm the action. |
> | To delete a proxy configuration, in the AIS Connect Proxy configuration group click the Delete icon by the required proxy server for AIS and confirm the action. |
Rebooting a service agent
> | In the AIS Connect Service agent group click the Restart icon and confirm the action. |
Reading logs
AIS Connect writes the Customer Support activities to logging files. The files have different formats depending on the type of session:
SSH sessions: logging files in text format
VNC sessions: html and swf logging files; here an html file and an swf file with the same timestamp always belong together
You can list and delete the logging files using the aisLog command. You can also view the logging files of SSH sessions with aisLog. As operator you enter the command on the shadow terminal, and as administrator you can also enter it in the terminal window of the Management Unit using the CLI tab, see section "Entering CLI commands".
The administrator should delete the logging files at regular intervals, to prevent the file system from overflowing.
You can only read the logging files of VNC sessions on a PC. Transfer the required logging file pair to your PC (e.g. with scp under an administrator account) and open the html file in the browser.